Recycle your old Ikea furniture into custom shabby-chic pieces!
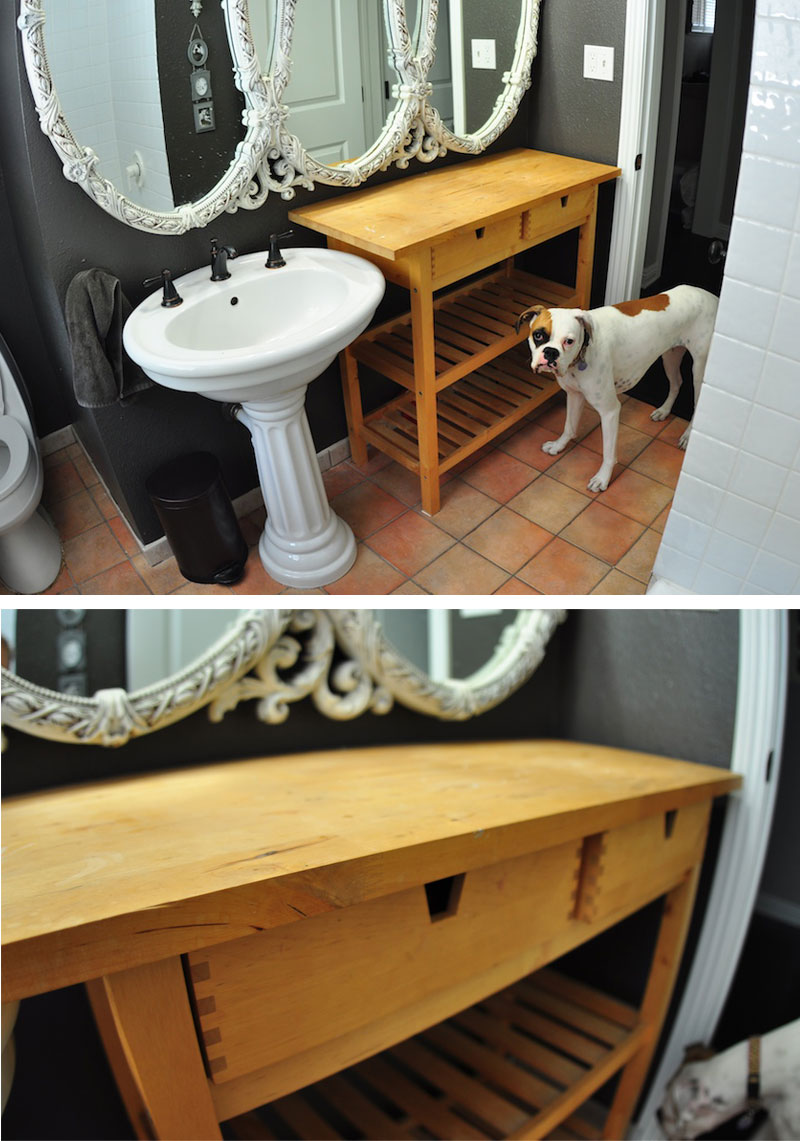
My boyfriend and I just bought a house in August, so naturally we have a hodge-podge of random Ikea pieces and hand-me downs from two separate apartments. What’s pretty amazing is that even with all the mis-matched items and out of date styles, we’ve been lucky enough to buy only two pieces of furniture for our new home. And even those are vintage! Justin loves projects and decided he could make our old Ikea kitchen hutch look better than any of the refurbished shabby-chic furniture pieces we always see at the flea markets here in LA. He’s come up with a pretty simple process to re-do your out-dated Ikea pieces:
Step 1: Face the facts. Come to terms that your furniture is birch, out of style, and clearly came from Ikea!
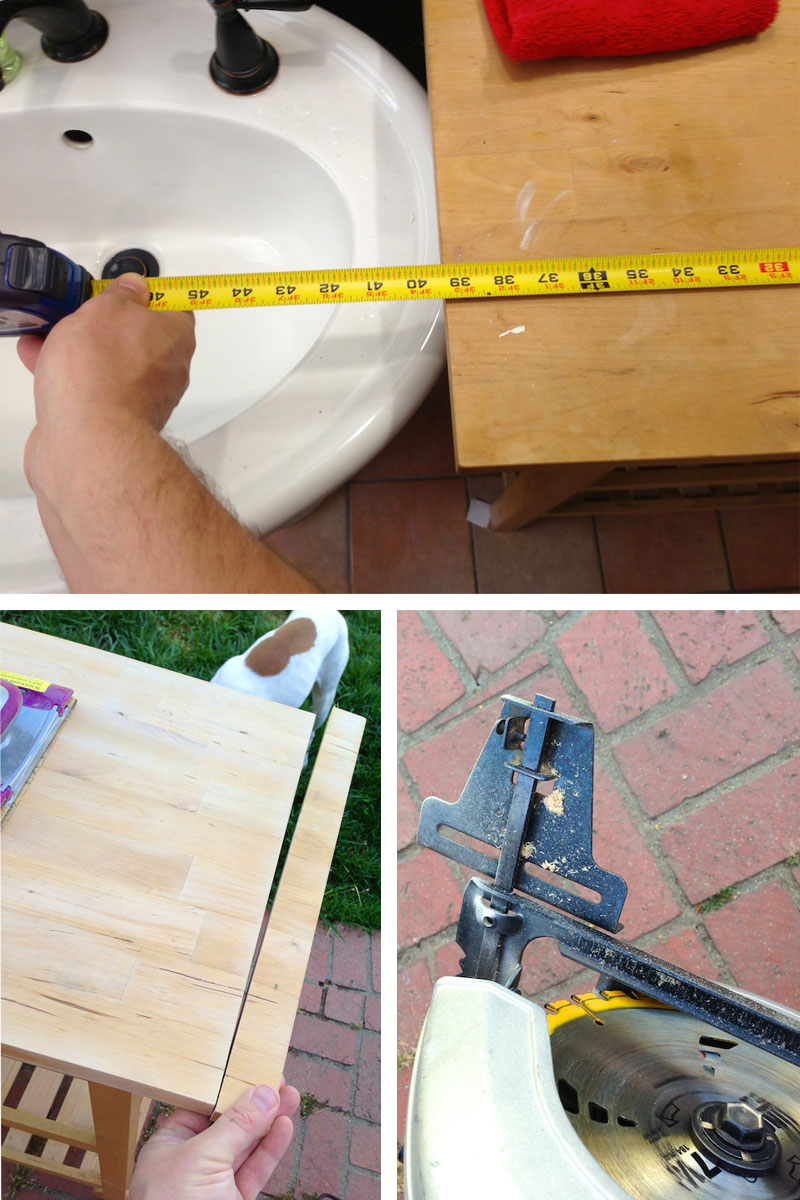
Step 2: Plan & Prepare. This piece was a little too big for our space and hung over the sink. I decided to saw off both sides 1 1/2 inches so it would stay even and line up to the side of the sink. Always remember to use a saw guide for straight lines! After that, I roughed up the surface with 60-80 grit sand paper. These birch finish pieces have a light top-coat polyurethane finish on them, so try to sand every nook and crany. Use a sanding block or device with handle, and try to always sand with the grain of wood. After sanding, wipe off excess dust.
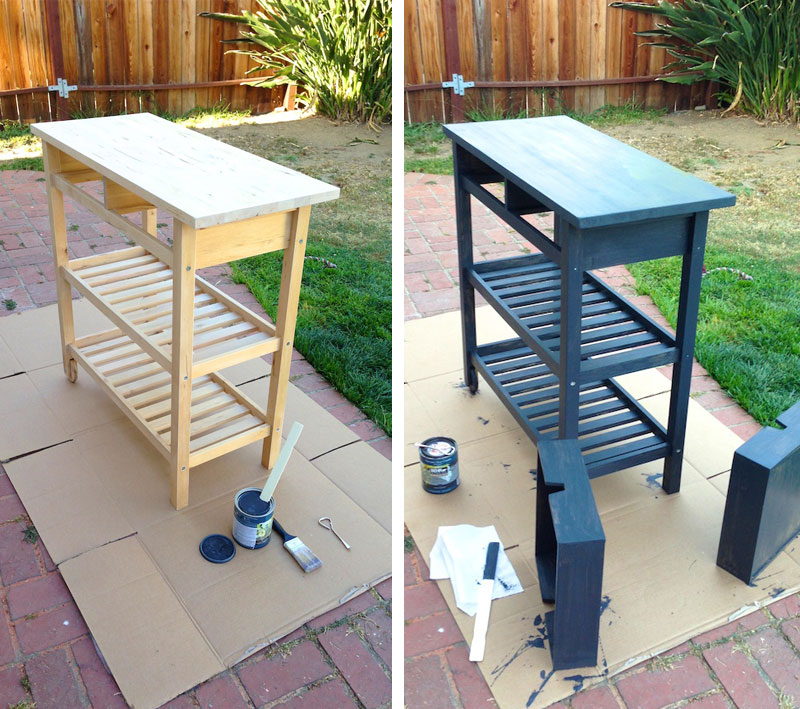
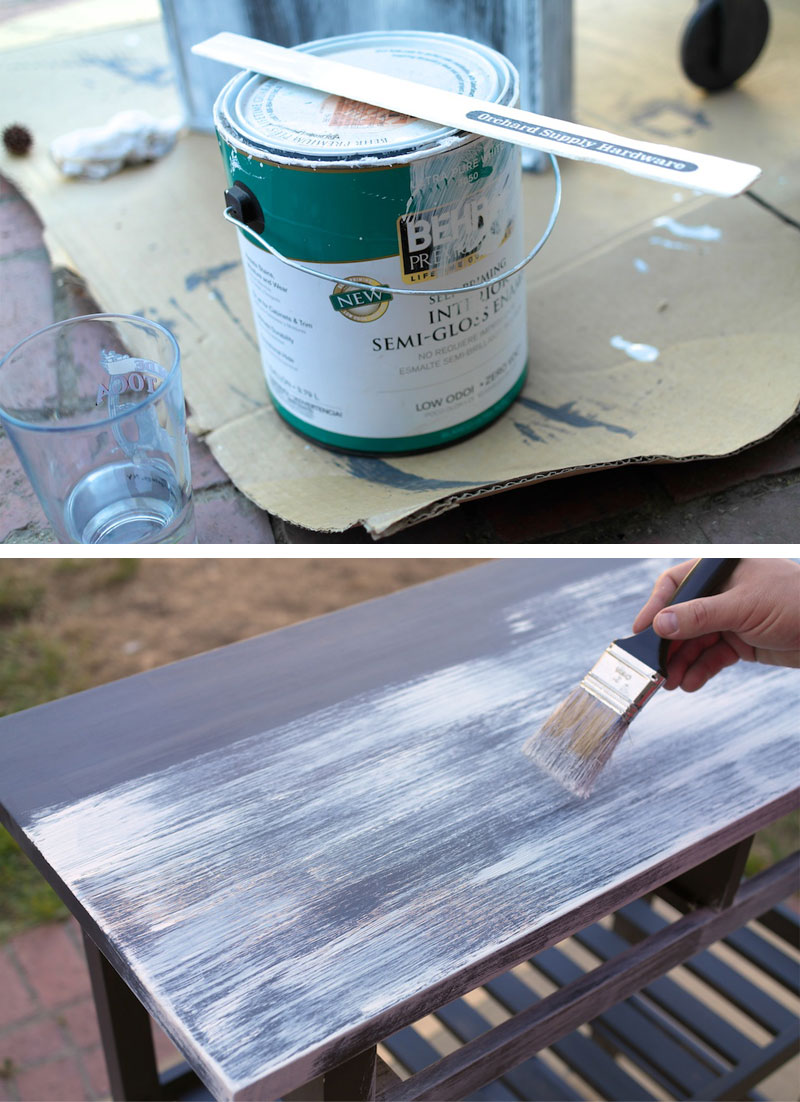
Step 3: Apply Base Coat. For this project I went with a dark gray which matches our painted walls. Matte or semi gloss is good & 1 coat will do. Just make sure to cover every area.
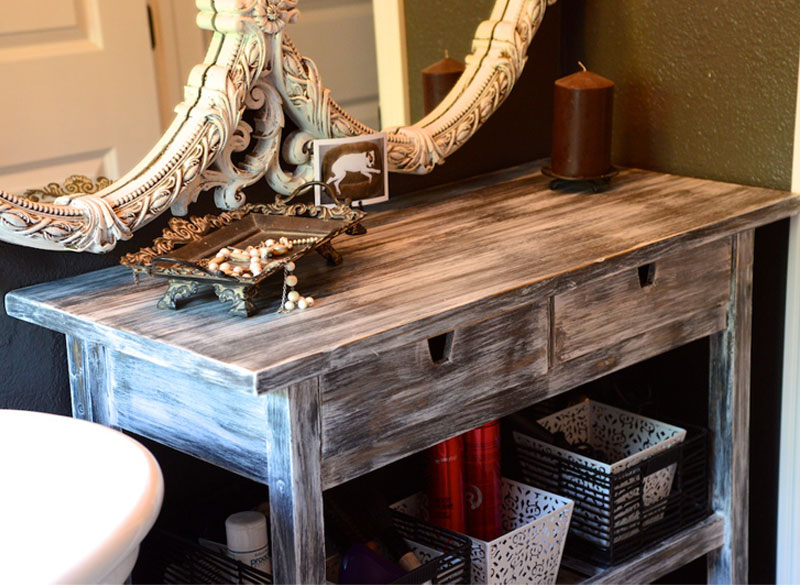
Step 4: Top coat. I went with a bright gallery white to match our mirror. The key to achieving good streaks is to coat lightly with a stiff bristled brush. Practice makes perfect- so test your technique on the back of a drawer before coating the whole piece.
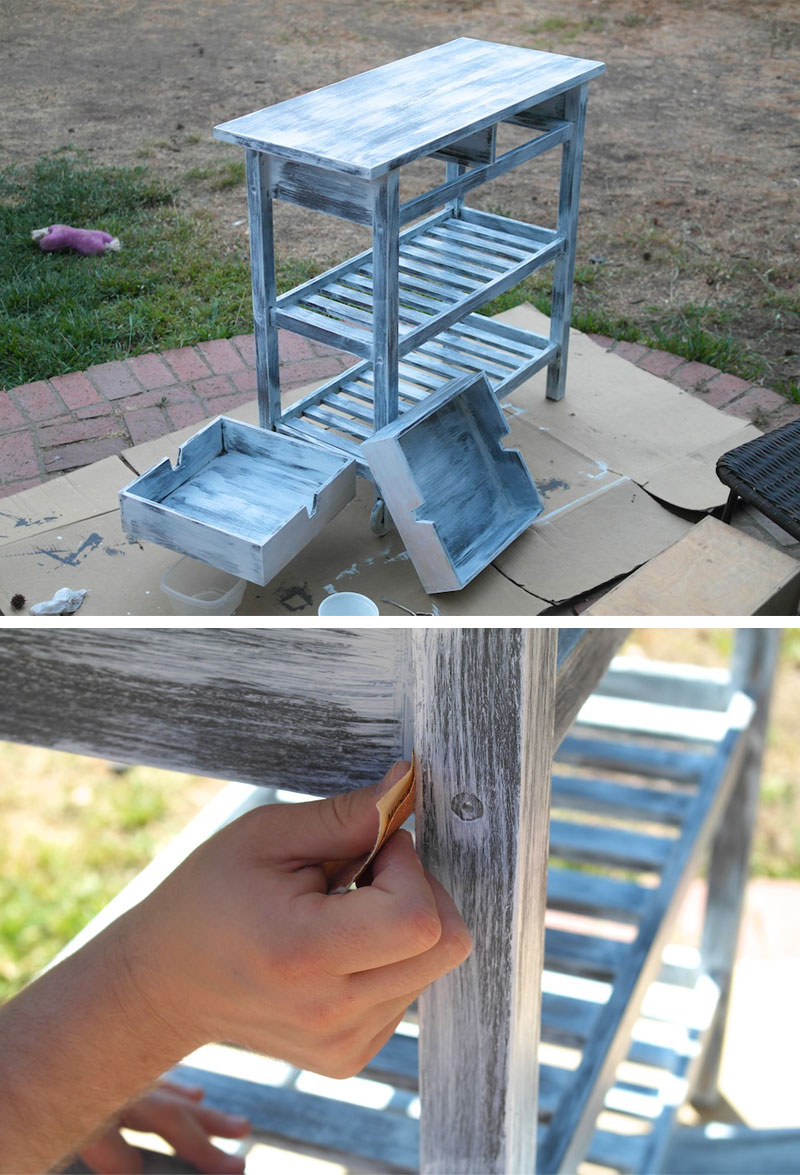
Step 5: Rough it up. After the top coat has dried I took a 60-80 grit sandpaper to the entire surface, with the grain, sometimes digging down to the natural wood. This adds to the aged look; and remember to practice on a drawer before doing the whole thing!
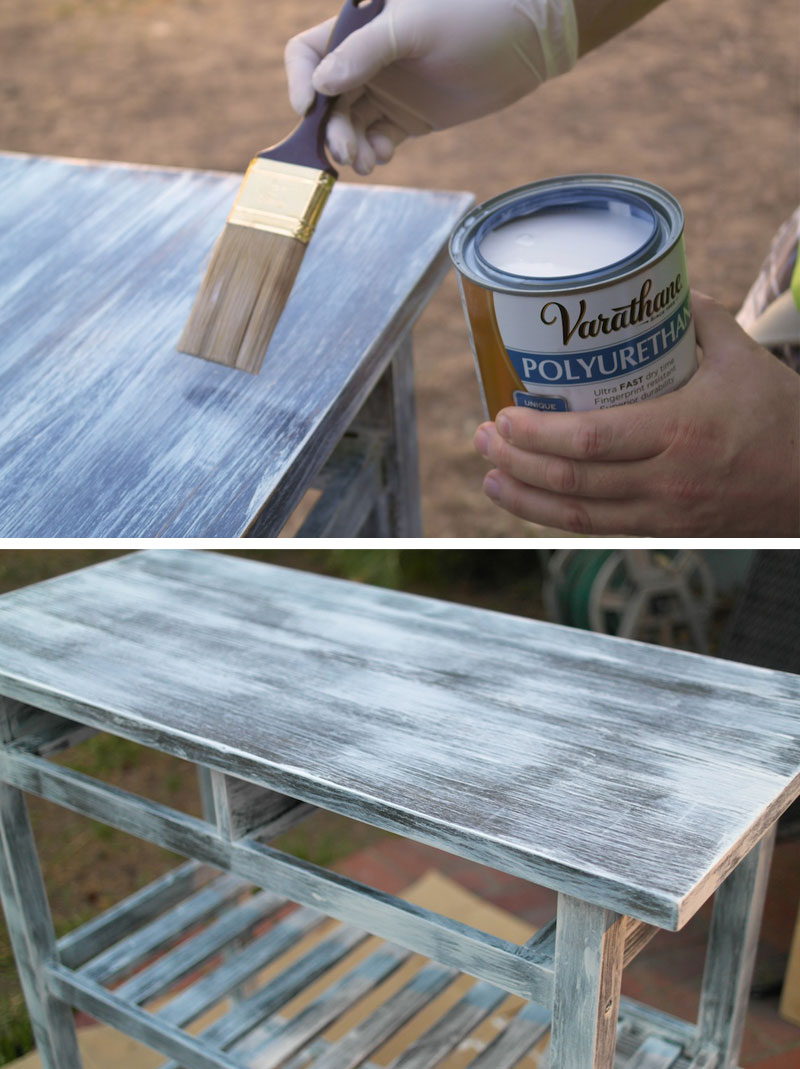
Step 6: Smooth it out. After you have age sanded, wipe off excess dust and apply the final finishing polyurethane coat. I used a water-based matte/satin finish that feels good and isn’t too shiny. I applied one coat to the entire piece, then a second & third in high traffic areas – the top, shelves & inside of drawers.
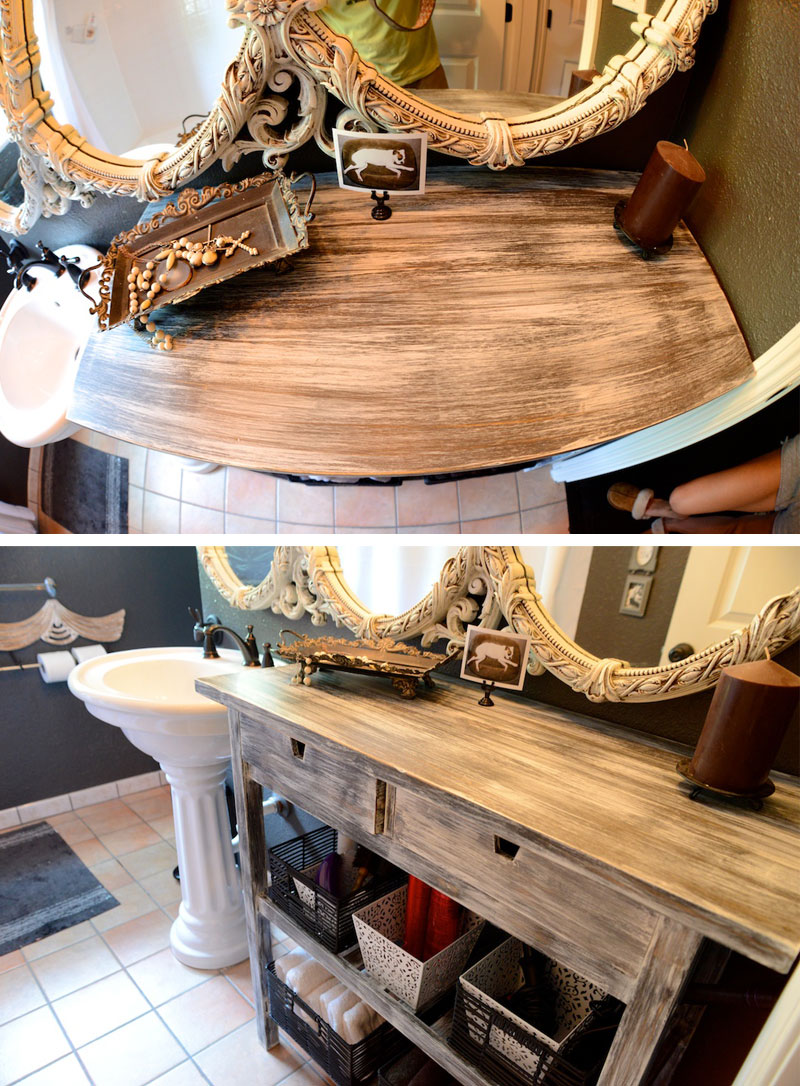
Step 7: Show off. Ta-da! you have a brand new re-finished piece of furniture that appears to be picked up from a trendy flea market. Now on to those ugly peach tile floors…
Photos by Justin Zangerle
P.S…..One of my FAV jewelry designers is giving all of my readers 25% June 7-9! Click on the link below!! I’m planning on ordering one of those awesome bracelet stacks below, aren’t they gorgeous??!! xoxo
Celebrate National Best Friends Day with Ettika! 25% Off Site Wide! Use Code: BFF25


When we lived in a Chicago apartment we purchased too many IKEA pieces that we aren’t in love with anymore but weren’t sure how to refinish so thank you for this tutorial! Can’t wait to try it once we get all those pieces out of storage!
Nice! It feels so good to re-use stuff you thought you’d get rid of:)
Amazing!!!
Thank you!!
xo
Where did you get those mirrors? I love them!
It’s one big mirror from the Melrose trading post in Los Angeles. (Such a good deal–$200) If you want the lady’s email, let me know!